• Home
  • About
Menu

Brooke Lark

2525 South 1500 East
Salt Lake City, UT, 84106
Phone Number
Storyteller.

Your Custom Text Here

Brooke Lark

  • Home
  • About
the blog ck.jpg

Blog

My Works-Every-Time Lightroom Editing Settings for White Food Photography

December 10, 2015 Brooke Lark

99% of my food photography is edited in Lightroom. The tool is incredibly simple to use, and incredible powerful. Learning to use it was a breeze. And though you hardly need a tutorial to pop in and start playing with the settings, over the years I've honed my control over the final look of my photos. 

After using Lightroom over and over again, I started noticing a pattern. Though every photo certainly begs for a personal touch, there were edits I was always making. The same settings being tweaked in the same ways. Before long, I found that this same pattern was consistently creating perfect photos everytime. 

So I turned it into a tutorial. And then, I turned it into a Preset. (Which you can download for FREEEEE at the bottom of this post.)

Get My Favorite Filter Now. It's FREEEEEE!

Since I use these settings over and over again, I've turned them into a Lightroom preset. Just one click, and I can apply them to any photo instantly. It's so easy!

Let's make your life easy, too. If you want my fave filter preset, just click the button below. I'll send you the file and even give you supereasy step-by-step instructions for installing the preset. Because, some of us are tech terrified, but this process is sooo simple, you don't have to be. Promise.

Get the Presets

Click here to get the presets & install instructions. In 5 minutes, you'll be up and rockin' with the prettiest free food presets on the internetz.

Your privacy always respected.

So excited for you to upgrade your edit skills (and save some serious time, too) with the power of presets. CLICK HERE TO DOWNLOAD the preset & install instructions NOW.

TRIED THIS TRICK?

If so, I'd love to see your photos! Upload a snap of your shot on Insta and tag me @cheekykitchen. Totally can't wait to see how this worked for you.

In Business Tags food photography
1 Comment

The Only 2 Photo Edits You Ever Need to Make

December 9, 2015 Brooke Lark

Here's a secret: I don't always take perfect photos. The exposure is oftentimes off. The lighting uneven. Sometimes the color comes out looking weird, yellowy and downright wonky.

Though a vital part of capturing gorgeous food photos comes in the actual capturing of the photo, post-processing or editing is just as important and snapping the right shot.

Editing is a whole artform unto itself. I know some photographers who love that part, others who dread it. For me, I don't mind it much at all, because I've learned two quick little tricks in Photoshop that take the time-consuming trudge out of the editing process. In fact, these two little setting changes are the ONLY edits I make to most of my photos when using Photoshop. My primary editing software is Lightroom, so I'm not in Photoshop much anymore. But when I am? Well, here's how I go from wham to bam.


Couldn't quite tell the difference between the edited and unedited photo in the video above? Here's a side-by-shot shot comparison.

Gorgeous, isn't it? Boosting the whites and adding a little soft light makes photos simply POP. 

In the video above, I mentioned that these edits are ideal for photos shot on white. Let me add to that a little.

By boosting your whites and adding color pow with the "soft light" filter, these two setting edits are ideal for ANY photo. 

Tried This Technique?

If you gave this trick a whirl, I'd LOVE to see the results. Upload a before & after shot to Instagram or Facebook, and tag me in it. (You can find where I am on each of the social channels here). Or tweet a shot to me @cheekykitchen. I can't wait to see how this easy tip worked for you!

In Business Tags food photography
Comment

Marly of Chopped Podcast Asked Me to Spill Big Secrets. I Totally Did.

December 2, 2015 Brooke Lark

I recently sat down with Marly McMillen for her brilliant podcast, Chopped. Bringing together some of the brightest voices in Food Blogging, her show offers an inside glance at top-notch talent. It was a pleasure to talk shop with her. 

If you've ever wanted to build your own online brand, become a blogger or watch the best HBO series in the world, you simply must listen to this episode of Chopped. 

Chopped Podcast.jpg

Here are some of the highlights, we discuss:

  • How I started my blog
  • How my goal when I first started was to make $500/month
  • My philosophy on food photography
  • Why I decided to focus on growing her email list
  • My strategy for tripling my email list in less than a year
  • All about my site redesign
  • Have you ever heard of pivoting? I discuss this and tell you why you don’t have to be stuck with the same mission for your blog
  • My favorite social media platform. It’s a new one.

Discov er all of this and more via Chopped Podcast now.

In Business Tags Media
Comment

5 Essentials for Dark Food Photography

December 2, 2015 Brooke Lark

The only 5 things you need to create a killer dark photography set-up.

Read more
In Business Tags food photography
Comment

Transform Any Photo Into a Holiday Shot Instantly with This Quick Trick

December 2, 2015 Brooke Lark
Blog Header- Holiday Hack.jpg

If you were to have a professional prop closet, your entire house would be overtaken with food photography supplies. There's just no way the average food blogger can be expected to have a massive rotation of props fit for each season.

Thankfully, you don't have to store dozens of different holiday plate sets. No need to stock up on Christmas candy for year-round shooting. With two totally simple ingredients, you can turn any photo into a festive holiday shot. Here how.

See This Idea in Action

Here are a few shots captured with this simple technique. Marvel over their merriness! Festoon over their festiveness! Then go toss all those piled of special holiday props. And keep it simple with this easy 2-ingredient trick.

2015-12 Christmas Cookie Cocktail- SUGAR COOKIE 1.jpg
Perfect Prime Rib.jpg
2015-12 Egg Nog Final 6.jpg
2015-1160 Minute Holiday HAM 5F.jpg
2015-11 Mistletoe Reshoot Final 2F.jpg
2015-1160 Minute Holiday SANGRIA 1.jpg
2015-11 Holiday Dinner Final 2.jpg
2015-12 Popcorn Balls Final 32.jpg
2015-12 Christmas Cookie Cocktail- SUGAR COOKIE 1.jpg Perfect Prime Rib.jpg 2015-12 Egg Nog Final 6.jpg 2015-1160 Minute Holiday HAM 5F.jpg 2015-11 Mistletoe Reshoot Final 2F.jpg 2015-1160 Minute Holiday SANGRIA 1.jpg 2015-11 Holiday Dinner Final 2.jpg 2015-12 Popcorn Balls Final 32.jpg

Tried This Trick?

Tweet me a shot of your Christmassey creation @cheekykitchen. I can't wait to see how this quick idea works for you!

In Business Tags food photography
Comment

This $20 Color Hack Should be Your First Food Photography Setup

December 2, 2015 Brooke Lark

If you want to upgrade your food photography game, it's worth investing in a few essentials. A decent dSLR camera and top-notch lenses are worth the price. But shelling out big cash for photography backgrounds? Not so much. 

Though dozens of specialized businesses now sell backgrounds for blogging (with most starting at $100 a pop), I've never needed to shell out big bucks for photography backdrops. And I don't recommend that beginning food bloggers do, either.

Whether you're just getting started as a food blogger, or are a seasoned pro looking for a fresh way to shoot, this simple $20 hack has made it easy to create some of the best images of my career. 

Join me in the studio and discover this secret now.

Photos Shot with This SetUp

Want to see this idea in action? Here are a few photos created on my colorful canvas squares. Turns out monochromatic is totally brilliant!

1-The Feisty Carrot (5).jpg
3-Broccoberry Crunch (4).jpg
4-Rocket Fuel (3).jpg
6- Wake Up Greenie (3).jpg
8-Cucumber Pear Blast (3).jpg
10-Invisible Spinach (3).jpg
11-Lean Green and Hi Protein (6).jpg
12- Grandmas Oven Smoothie (2).jpg
12-5.jpg
15-5.jpg
19-Tropicool Zester (8).jpg
21-1.jpg
27-2.jpg
30- (5).jpg
1-The Feisty Carrot (5).jpg 3-Broccoberry Crunch (4).jpg 4-Rocket Fuel (3).jpg 6- Wake Up Greenie (3).jpg 8-Cucumber Pear Blast (3).jpg 10-Invisible Spinach (3).jpg 11-Lean Green and Hi Protein (6).jpg 12- Grandmas Oven Smoothie (2).jpg 12-5.jpg 15-5.jpg 19-Tropicool Zester (8).jpg 21-1.jpg 27-2.jpg 30- (5).jpg

Used this Technique?

I'd love to see how this idea worked for you. Leave a link below and share your photos. Or tag me via Instagram. Can't wait to wow over your images!

In Business Tags food photography
2 Comments

Triple Your Email List with LeadPages, Here's How.

December 1, 2015 Brooke Lark

Please note: The following post contains affiliate links. 

In the online world, bloggers were once able to rely on ad-based income. But the wild, wild web is changing dramatically and with it, the way we bloggers connect with, interact with and make cashmoney from our audiences.

Now more than ever, we must to stop thinking like bloggers and start thinking like marketers. And marketers know connection with readers doesn't lie in sometimes-seen sidebar widgets and blog post links sprayed haphazardly to social media feeds. Instead, 51% of marketers in a recent survey indicated the top digital channel of 2015 is...email.  

Why the Email List Reigns

We can no longer wait for connection with readers to happen on our turf, we must make it happen on theirs.  Getting in front of our readers eyes, sitting with welcome words in their inbox is 40x more effective than connecting via Facebook and Twitter.  Studies show 91% of consumers check their email at least once daily, whereas just 70% of Facebook subscribers use the site everyday. 

If you want to boost traffic, increase sales and build your brand, you need an email list. 

But, if you're like me, you spent the first thousand months of your blogging career not capturing leads. In fact, when it comes right down to it, the very idea of asking readers for email addresses makes you sweat. It may feel salesy, pushy or annoying. After all, you've been to a dozen websites with those hideous little pop-ups begging for your info. And it's downright irritating, right?

I'm totally with you. I can't remember the last time I typed my email address into a pop-up box. They're annoying for readers and becoming more ineffective by the day for site owners.

The great news here, however, is: there is a better way.

In fact, there is a significantly more awesome way to capture leads, create a loyal audience of readers and grab email addresses by the thousands. I know because I tripled my email subscriber list in just 3 months. And I did it without sidebar ads, spontaneous pop-ups and stupid salesy lingo.

Instead, I used LeadPages to share free downloads with my readers. The results have been absolutely astonishing.

Here is a step-by-step tutorial to show you LeadPages can turn every page of your blog into an email-list-building machine. 

Why Use LeadPages?

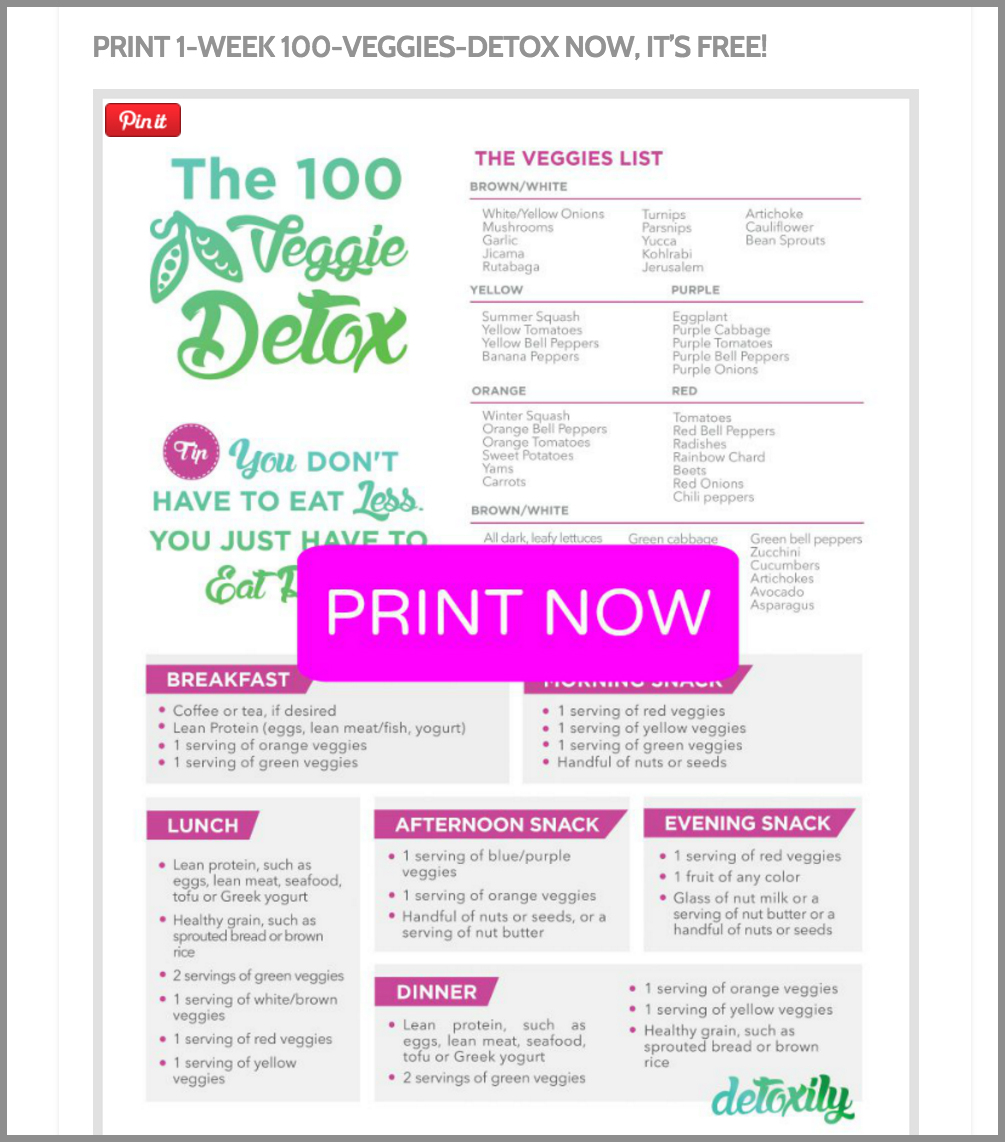
The first step to building your email list is to stop thinking of your blog as a blog. You have to start seeing it as a resource for readers. Readers don't need free content anymore. We're all so inundated with free content, we can barely see straight. We've got long lists a la Buzzfeed, pages and pages of ideas from Pinterest, expert articles, video tutorials, brand channels, recipes, roundups, free ebooks, social feeds updates by the minutes. Everything feels like a whirlwind all the time. Your readers don't need more thrown at them. They don't need a 101 page ebook or a post with 2000 images and a slew of new ideas. They need to feel like you help them cut through the noise. They need simple. The need instant. And they want one page printables.

Instead of appealing to your readers by giving them more-more-more, give them instead...less. A simple, one page PDF that can be easily printed. Then hung on their fridge as an easy-reference resource. 

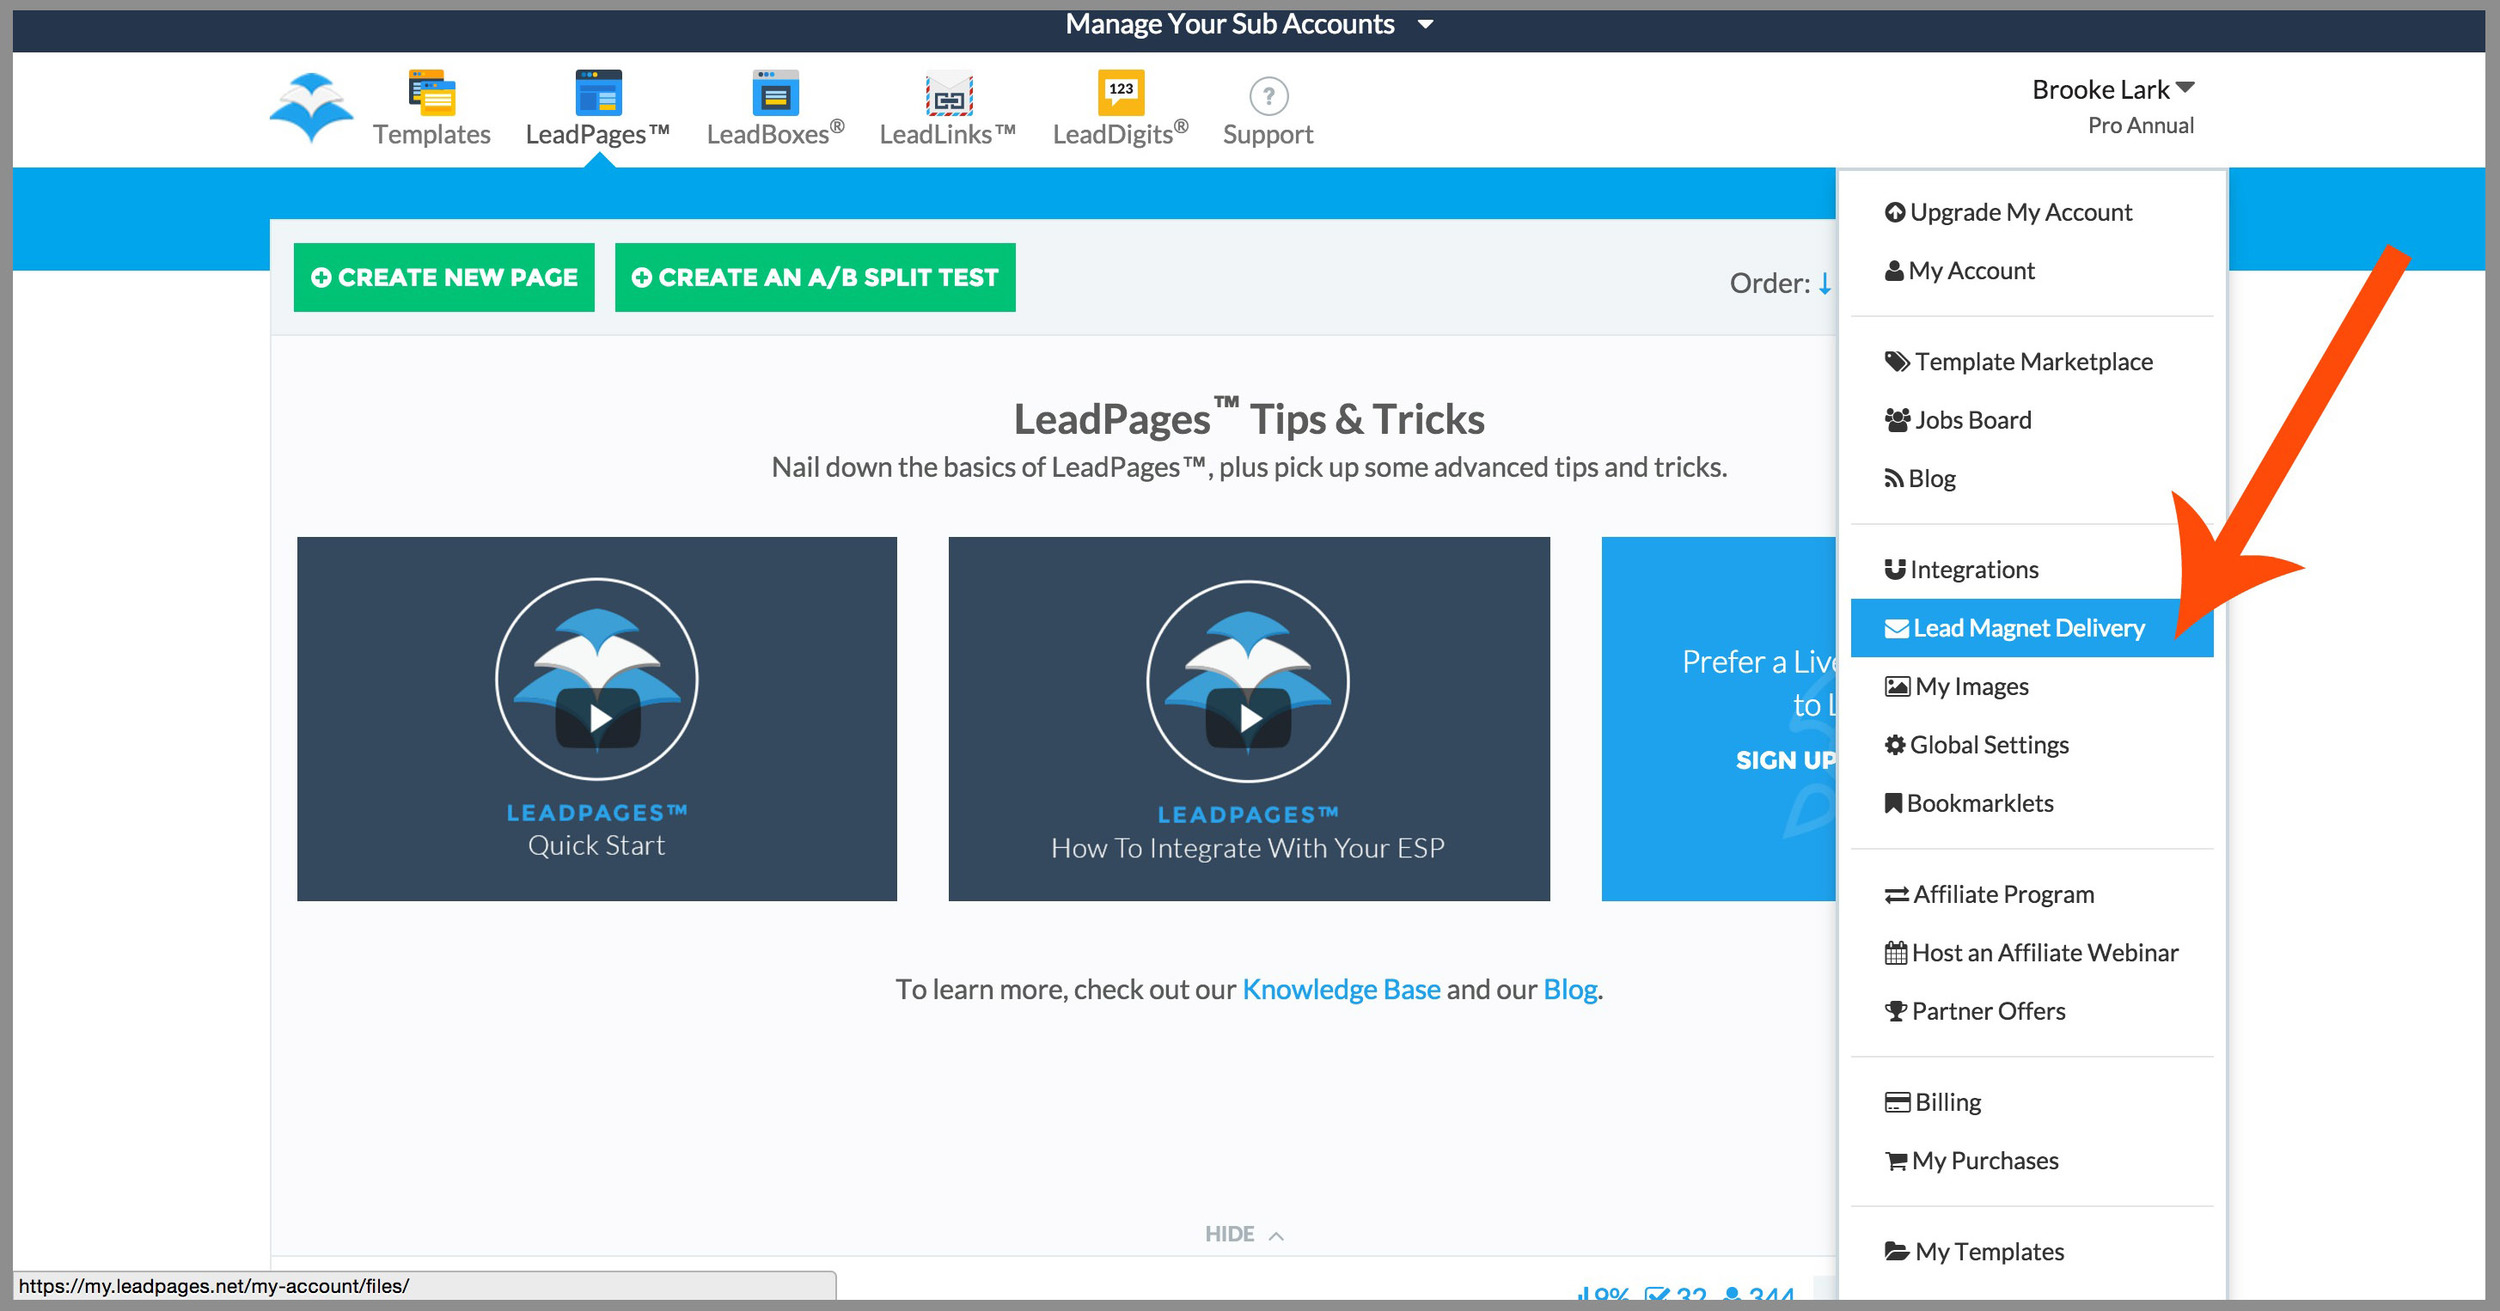
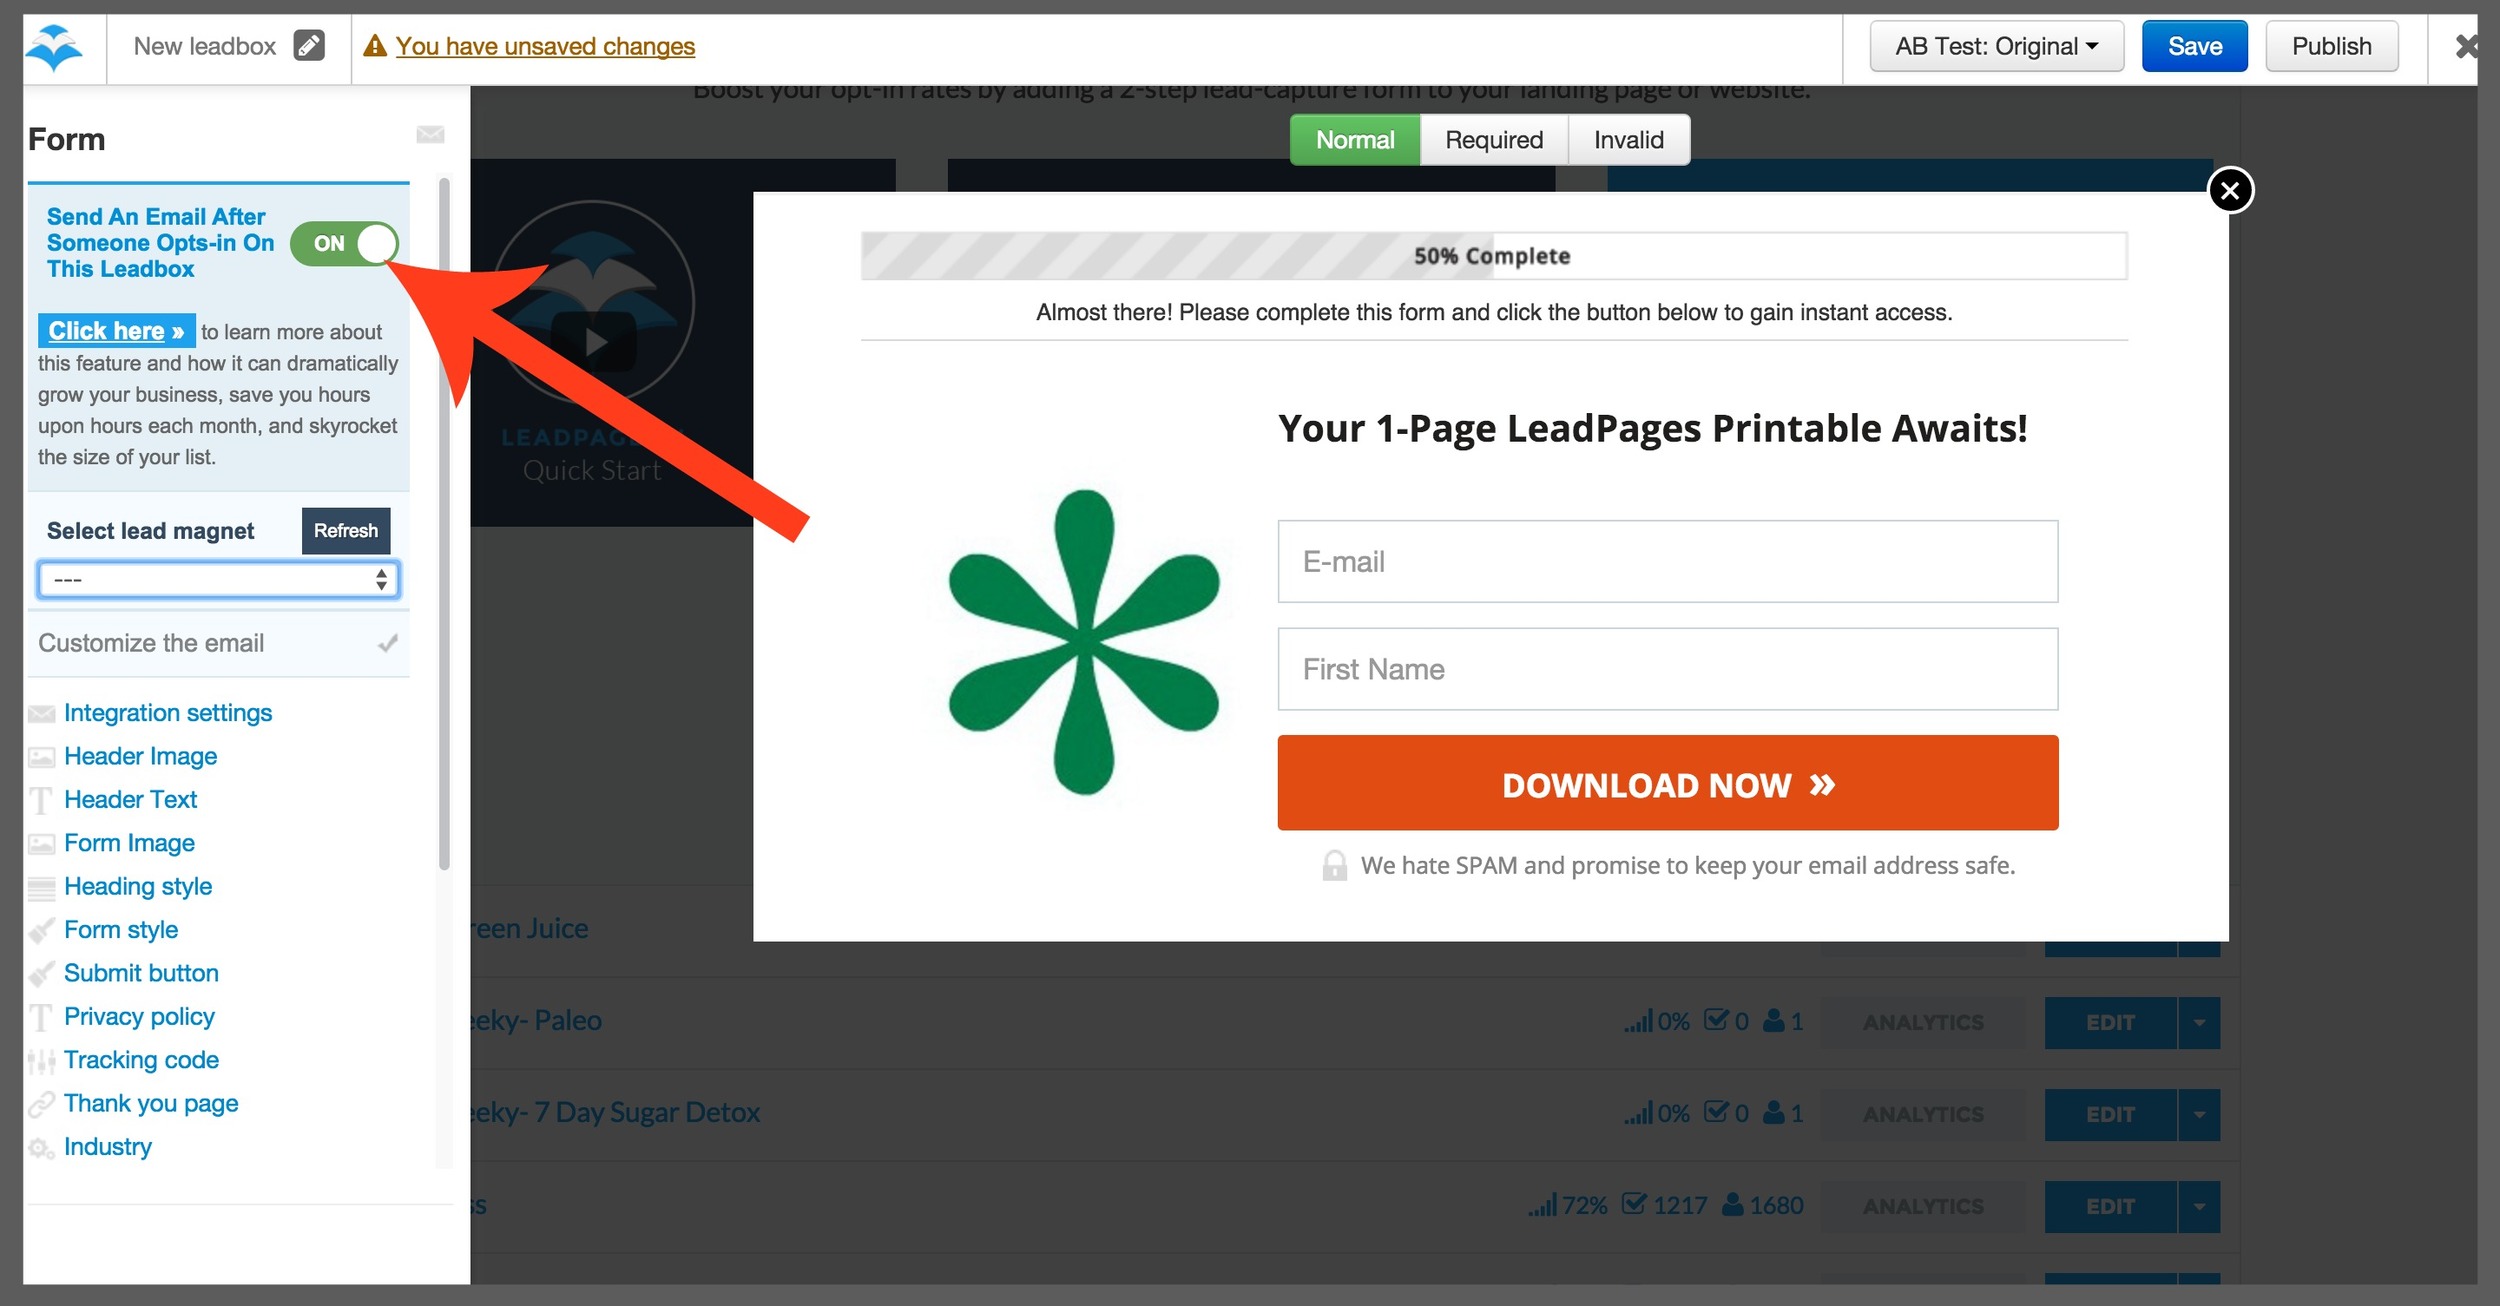
LeadPages has a simple integration tool that makes it incredibly easy to incorporate customized downloadable on every page of your blog. Once you've create a one-page PDF, you can quickly connect it to a LeadBox which automates an email form and sends the download to subscribers for you. The entire process is automated! You set it up once, and it works for you 24/7! 

  • All About PDF's. Wondering what sort of printables to include in your blog posts? Be creative! Infographics, referral sheets, shopping lists, menu plans and other resource guides are all incredible useful. You can easily create your own PDF's in Word or Photoshop. But, if the entire process feels overwhelming, I love working with contract designers from UpWork and 99Designs. The sites make it easy to scan portfolios, finding designers who match my personal style. Though prices may vary, you can typically expect to pay between $60-100 per PDF. With infographics starting around $150/each.

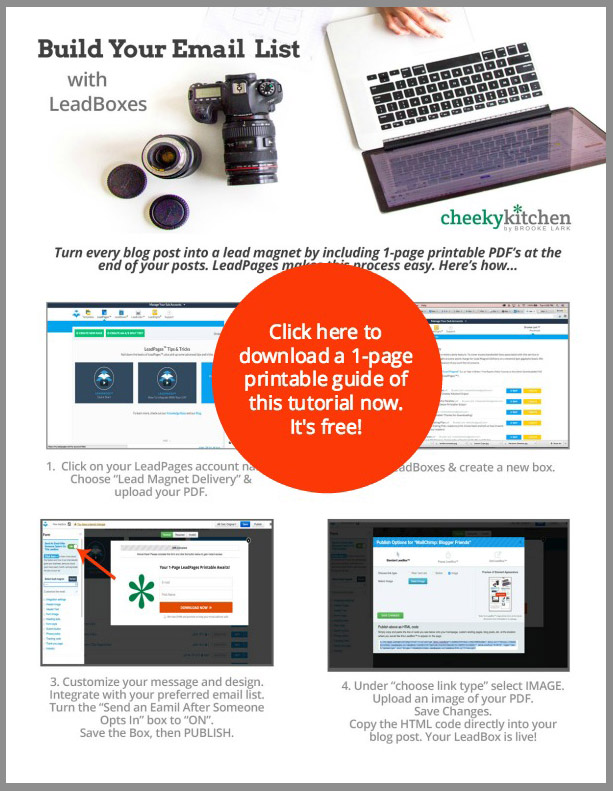
How to Make a LeadBox

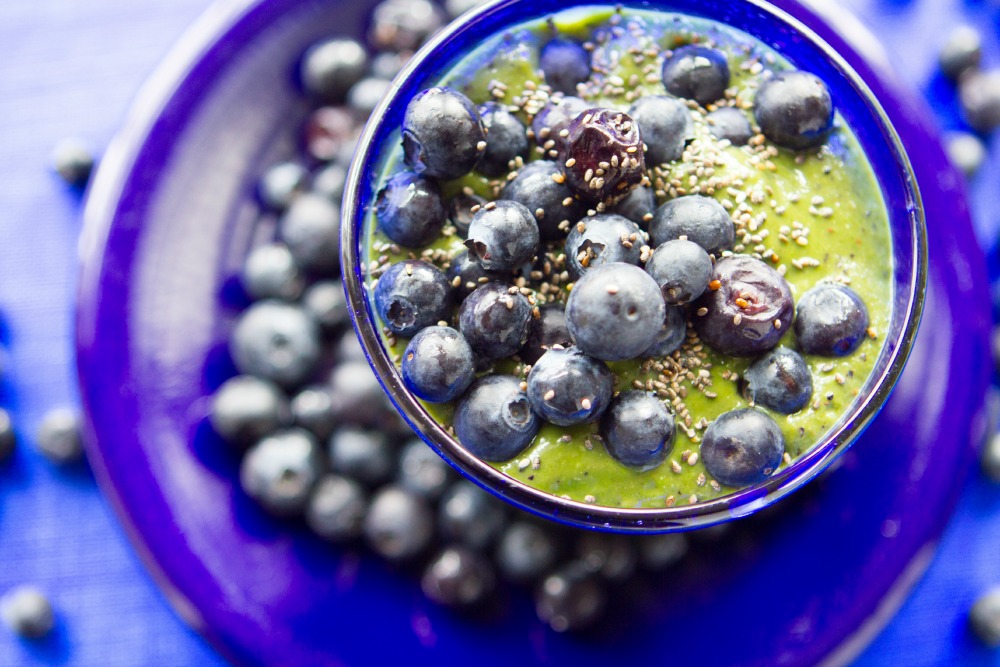
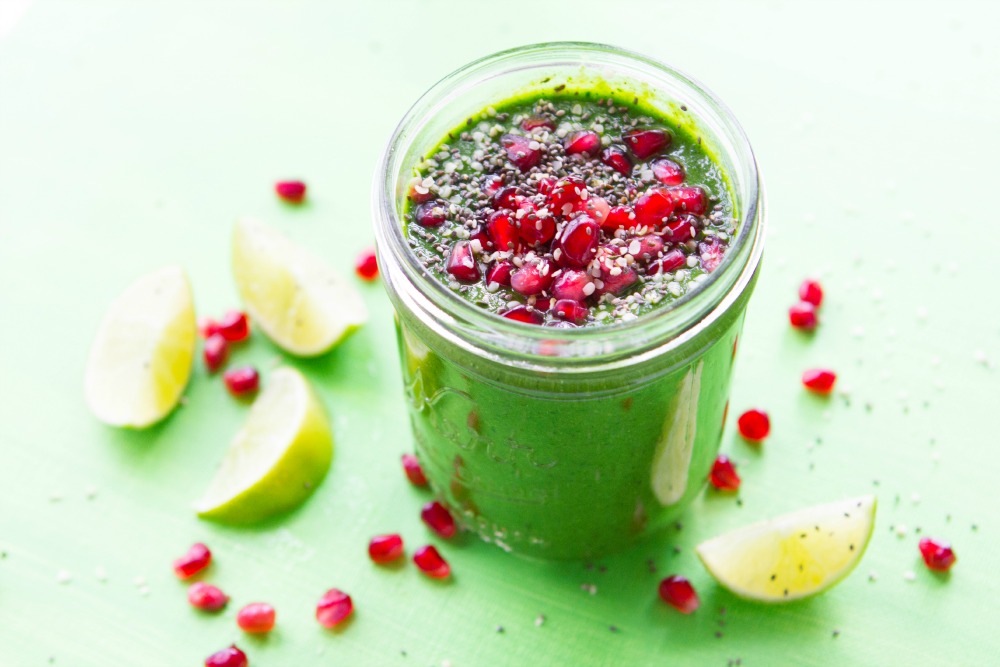
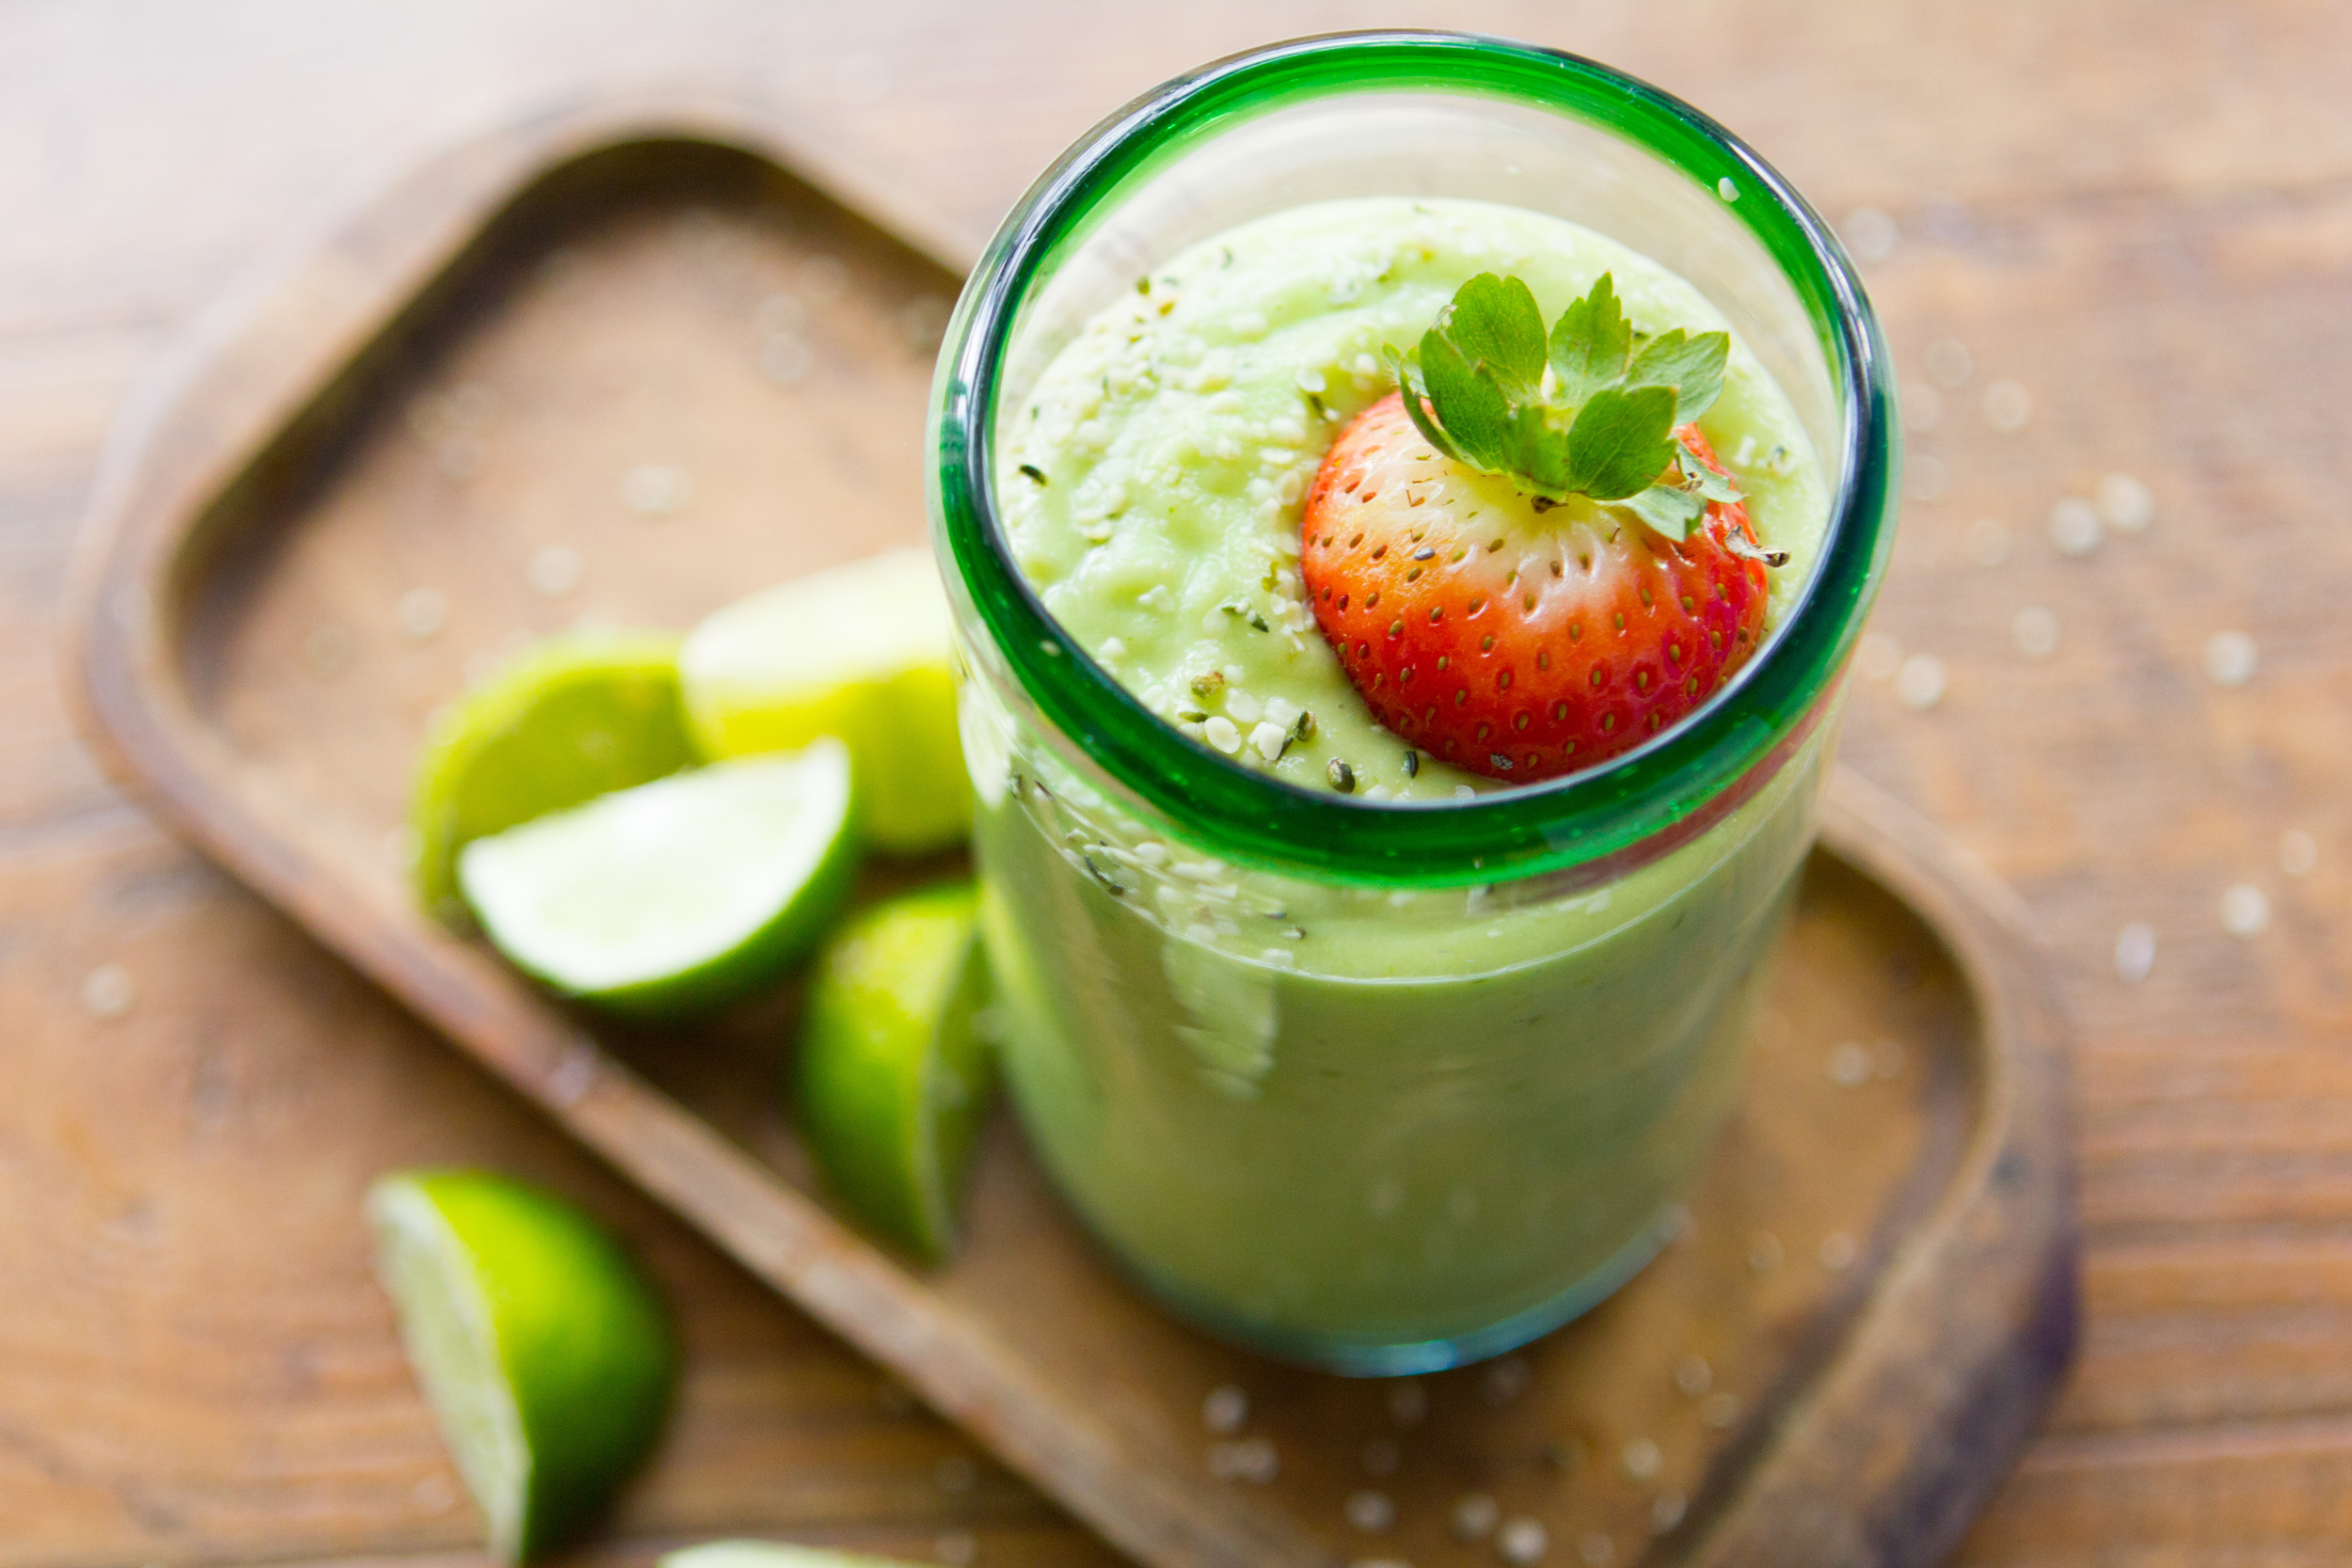
For my own site, I started creating 1-page eating plan printables. You can see how they worked on my old site by clicking here. 

Essentially, readers would click on a blog, read through it. Then at the end of the post, there would be an image of the downloadable with a button inviting them to "Click to download" or "download now." (I used free online editor PicMonkey to create the button and text overlay on a jpg image of my PDFs.) 

It looked something like this:

Note: this image is NOT technically uploaded to my blog. It's actually connected to, created by and hooked up to a LeadPages LeadBox.  To create your own, you'll need an LeadPages account. The basic Standard Annual ($25/mo) account is all you need to get started.

Step 1: Upload Your PDF

Once logged into your account, click on your account name and select "LEAD MAGNET DELIVERY"

Screen Shot 2015-12-01 at 4.06.08 PM copy.jpg

Scroll to the bottom of the page and click "UPLOAD NEW FILE". Follow the steps to upload your PDF, including a short message which will be sent via email to recipients. 

Screen Shot 2015-12-01 at 4.09.06 PM copy.jpg

Step 2: Create a LeadBox

With PDF uploaded, it's time to integrate your download into a snazzy little image. Click on the "LEADBOXES" icon in the upper navbar of your account.

Screen Shot 2015-12-01 at 4.13.47 PM.jpg

Then, click  "CREATE A NEW LEADBOX". A pop-up will open, asking you to indicate the type of box. Select the category that best fits.

A LeadBox editor will open. This area allows you to customize the integration settings.

Integrate the form with your email subscriber, then click "CUSTOMIZE THIS FORM" to open the form editor. 

There are a variety of settings, pick and choose whichever work for you. The most important part of this process is turning ON the "Send An Email After Someone Opts-in On This Leadbox" section. Once selected, you'll be able to dropdown the "SELECT LEAD MAGNET" menu, picking the PDF you just uploaded. If it's not showing up, simply click "REFRESH" an try again.

When the LeadBox is exactly as you like it, press SAVE then PUBLISH.

At this point, you'll have several options for sharing your LeadBox. You can turn it into a text link, create a simple button or connect it to an IMAGE of your PDF. I typically use the image as a lead magnet for my LeadBox.

Simply click "IMAGE", select an image of your PDF (you'll want the image to be sized perfectly to fit your blog since it will be pulled as-is into the code). Press "SAVE CHANGES" then copy the HTML code and paste it into the HTML area of your blog post. Once published, the LeadBox will generate an image, pulling readers into the subscriber email campaign you've just created. 

Print This Tutorial Now

I've turned this whole post into a simple step-by-step tutorial. Just click on the image below and I'll email you a printable version. Whenever your ready, you'll be able to add LeadBoxes to every page of your blog and build your email list #likeaboss.

Tried This Tutorial?

I'd love to see how LeadPages and LeadBoxes are working on your blog! Leave me a link so I can come check out your email-building abilities. Or, buzz me a message via social. I can't wait to connect. 

Let Me Break It Down for You.

Building a business, finding a balance. There's so much to do, it can be hard to keep on top of it all. Which is why you need my two-bite tips. Crazy simple tricks you can put into action right.now. Delivered right into your inbox. Sign up and start kicking ass all over your existence.

Your privacy is always respected.

Thank you!
In Business Tags marketing
Comment
← Newer Posts
meetyourhostess.jpg
Search by Category
  • #foodforlife
  • 2 ingredient
  • 3 ingredient
  • 4 ingredient
  • 4-ingredient
  • 5 ingredient
  • Bobs Red Mill
  • Branding
  • Breakfast
  • Coffee
  • Copywriting
  • Creative AF
  • Emails
  • Facebook
  • Food Photography
  • Freelance
  • Giveaways
  • How to Cook Like a Food Stylist
  • Instagram
  • Keto
  • Kickstart
  • Lunch
  • Media
  • One Pan
  • Photography
  • Props
  • Salad
  • Self-Made Creative
  • Social Media
  • Staples
  • Style
  • Udo
  • appetizer
  • autumn
  • baking
  • beverage
  • bowl
  • breakfast
  • bundts
  • business
  • cake
  • casserole
  • chocolate
  • christmas
  • church food
  • cocktail
  • crockpot
  • dessert
  • detox
  • din
foodphotographer.jpg
freephotos.jpg

"The Most Motivating Messages I GET ALL WEEK!"

Wish you had a Creative Sherpa to guide you through the madness that is building your own creative brand? Signup for my “3 Things Creatives Need to Know This Week” and I’ll deliver the best darned everythings straight to you, with hugs and smooches and hell yes’s, too.

We respect your privacy.

Thank you!

PLEASE NOTE: Blog posts & site pages contain affiliate links.